Access Controllers
In Access Controllers, you can add, edit, enable, disable, and delete controllers. You can also edit the door authorization time and method, as well as customize door privileges for individual cardholders. Refer to the Support List for door controllers compatible with Surveillance Station.
Add Controllers
For users of A1610, please first download the VAPIX firmware and upgrade it with the controller's web interface, and refer to the white paper to configure the controller.
Click Add and fill in the required fields.
Note:
- A1610 requires a separate license for each door.
- A1001 requires a single license per controller.
Configure controller information:
- The controller name is case-sensitive and allows only 1 to 32 Unicode characters. Symbols such as ! " # $ % & ' ( ) * + , / : ; < = > ? @ [ ] \ ^ ` { } | ~ are not allowed.
- IP address cannot accept hostnames.
- The Search icon
 displays all controllers within your domain. Choose a controller and the system will automatically fill in the fields for IP address, Port, and Model.
 - Server allows you to select a different host for your controller, available if your NAS is the CMS host. Note that cardholder and access rule configurations are specific to that server.
- Username is case-sensitive, and only allows 1 to 32 Unicode characters.
- Password is case-sensitive, and should be up to 24 displayable characters, including letters, numbers, signs, and spaces.
- Test Connection allows you to verify controller connectivity.
Configure door settings:
- Under General, pair a camera to the door for improved parameter security.
- Under Door Access Duration, set different Access time and Open too long time for Regular users and those who are granted Extended access.
Configure door admittance and exit permissions:
Use the following settings to set the grid cell of time and day when the door can be accessed (Reader or REX only appear if installed).
-
Under Reader, click the square next to PIN, Card number, Card raw, Customize, or Delete, and then select any grid cells to determine the time users may access the door. To select the entire day or hour in each day, click the day or hour.
- PIN: Grant access by entering the 4 to 32-digit PIN. Please note that the PIN length is subject to the capabilities of the installed reader.
- Card number/Card raw: Grant access by tapping with an authorized card.
- Customize: Click the square next to Customize to view the Identifier list. Determine access methods for the door. For identifiers ending with + PIN, enter the PIN and then use the identifier.
- Delete: Door access will not be granted during the time you set.
- Under REX, click Active or Delete to decide the time you would like the door to be accessed. For users of A1001, please go to AXIS Entry Manager to edit the REX schedule settings.
Configure advanced settings:
Network time server and a time zone can sync the time for this controller.
Edit Controllers
Go to Access Controllers, select a controller, and click Edit,or double-click a controller to edit its configurations.
- Select a door under Edit Controller > Doors and click Edit, or double-click a door to direct you to the Edit Door page.
- Under Log Settings > Log Rules, you can mark events that trigger alarms as Alarm in the Log Center. If you deselect an event, its log will not be recorded.
Retrieve Data
If you have changed the controller's configurations via its web interface, click Retrieve to sync your modified data to Surveillance Station. This action will override your previous settings.
Enable or Disable Controllers
You can enable or disable your controllers. Disable a controller will not delete its settings.
Delete Controllers
Select the controller you want to delete and click Delete. This action will permanently delete all logs from Surveillance Station, but cardholder information will be kept.
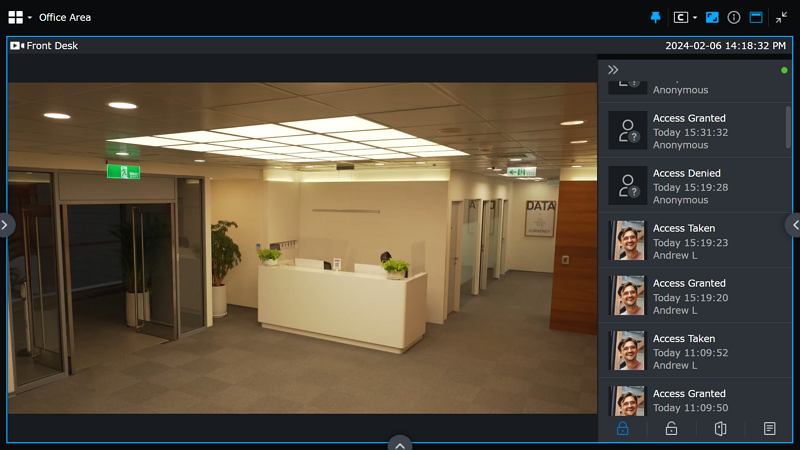
Monitor Center Integration
Drag a door to a layout in Monitor Center from Devices & Tools to see the live view of your paired cameras, events, and alarms.
Operational icons available:
 /
/  : Lock/unlock the door.
 : Unlock the door temporarily.
 : View logs.